These classic peanut butter cookies come together in no time to make Nutter Butter Mummies, and you’ll have fun getting the kids involved in the preparation.
This easy-to-make snack will liven up any gathering with its tasty cookie mummy wrappings and silly eyes.
Plus, it’s a great way to get the kids involved in the preparation.
So go ahead and break out those classic peanut butter cookies and make some mummy cookies with just 3 ingredients.

It’s time to make some cool and creepy mummies just in time for All Hallows’ Eve.
Makes around 30 cookies
Prep time: 30 minutes
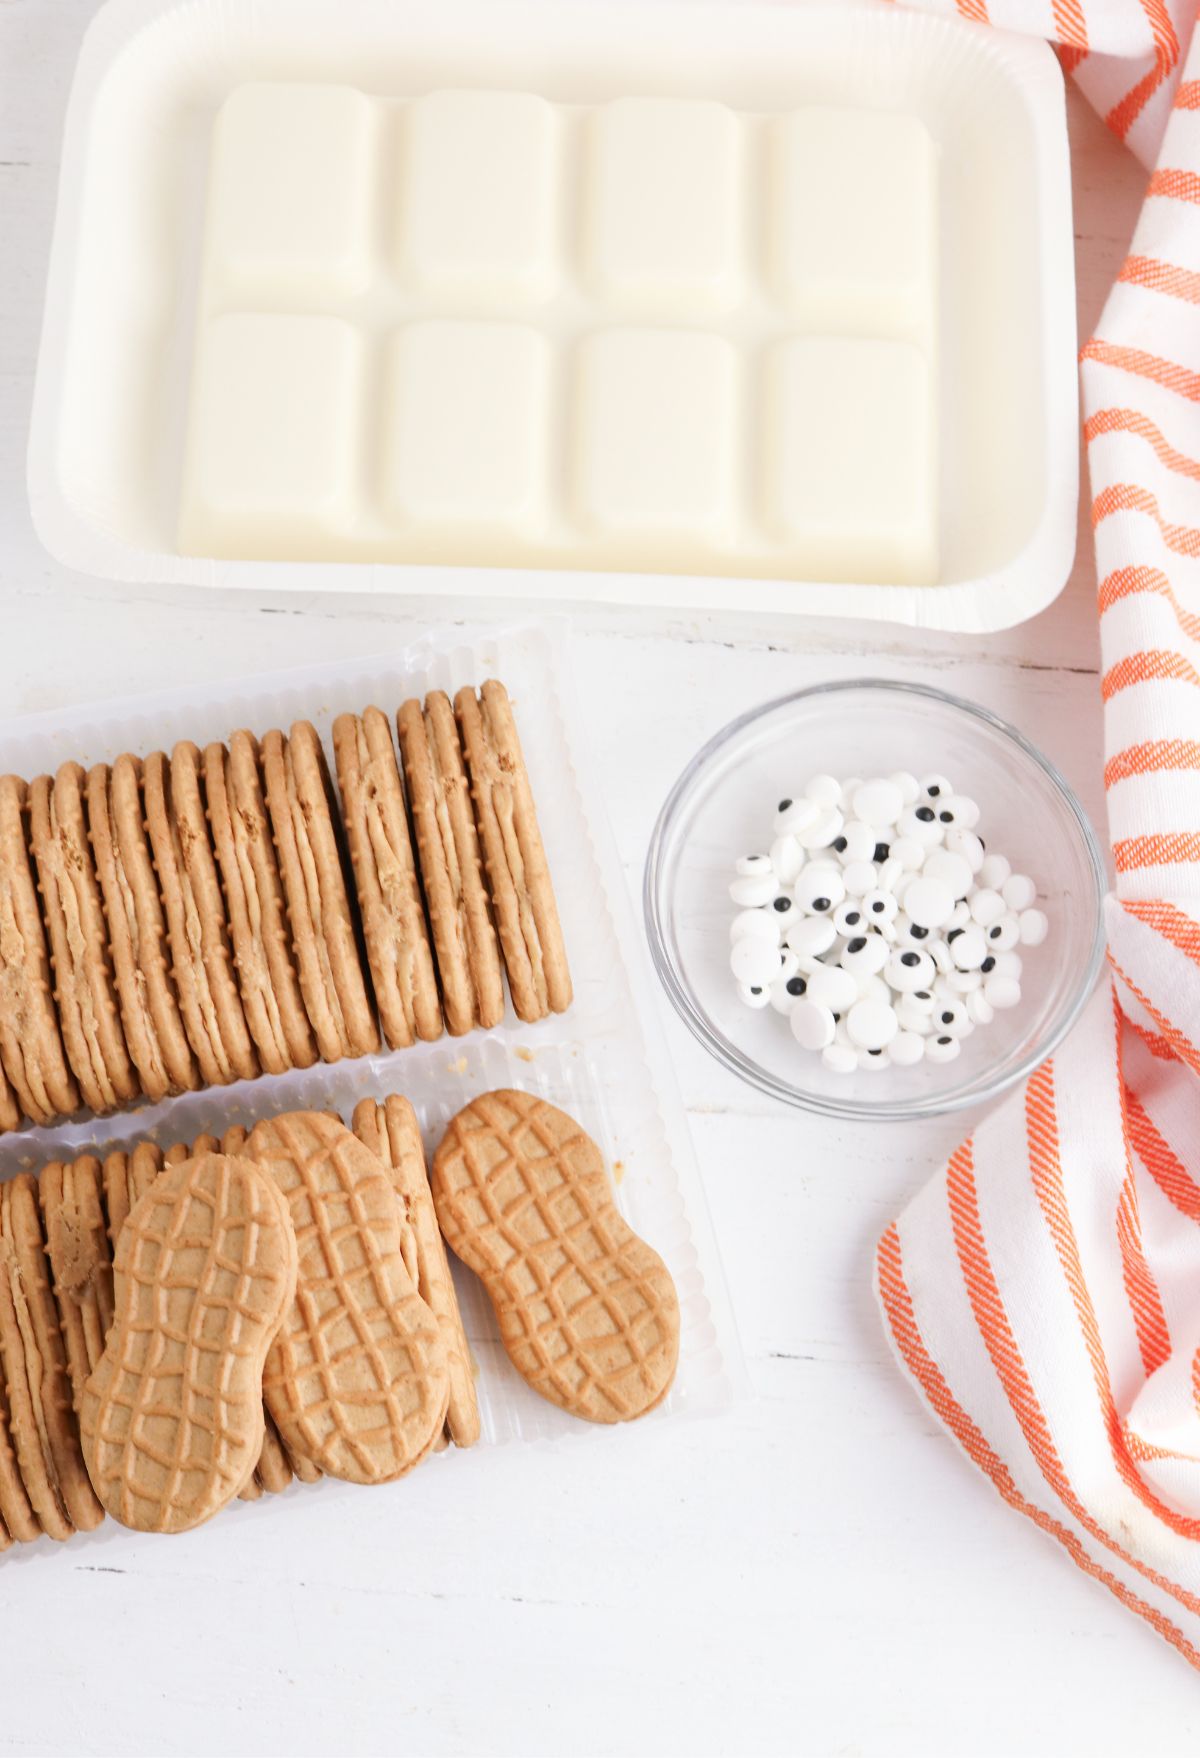
Nutter Butter Mummies Ingredients
- Nutter Butter cookies
- vanilla melting chocolate
- Candy eyes
Kitchen Baking Supplies
- Cookie Sheet
- Parchment Paper
- Microwave safe bowl
- Rubber spatula
How To Make Nutter Butter Wafers Mummies
Prep Your Workstation
Before getting started, make sure to clear and clean your workstation. Gather all your ingredients, along with a baking sheet, microwave-safe bowl, and toothpicks. Cover the baking sheet with parchment paper and set it aside – this will be your landing spot for the coated cookies.
Melt the White Chocolate
Combine the white chocolate chips and vegetable shortening in a microwave-safe bowl. Melt the mixture by microwaving it in 30-second intervals, stirring after each until it becomes smooth and creamy. Be cautious not to overheat the chocolate, as it will become unmanageable and lose its silky texture.
Coat the Nutter Butters
Grab a Nutter Butter, place it on the toothpick, and carefully dip it into the melted white chocolate mixture. Ensure to coat the cookie evenly; you can use a spoon if necessary. Gently tap off any excess chocolate before placing the cookie on the parchment paper-covered baking sheet.
Add the Mummy Face
Before the chocolate coating on the Nutter Butter hardens, press two candy eyeballs onto the cookie. You can use a toothpick or tweezers to place them accurately.
Create the Bandages
Once all the Nutter Butters have their eyeballs in place, use any remaining white chocolate mixture to create the mummy’s “bandages.” Fill a Ziploc bag with the chocolate, snip off a tiny corner, and carefully drizzle it over the cookies to create a bandage-like pattern.

Add the Finishing Touches
For an extra creepy touch, you can add chocolate chip “bandages” to your mummies. Just press them lightly onto the drizzled white chocolate before it hardens.
Allow the cookies to set for about 15-20 minutes in the refrigerator. Once set, the Nutter Butter mummies are ready to serve!

And there you have it, an easy, fun, and scrumptious Halloween treat to impress your family and friends!
Nutter Butter Mummy Cookies are sure to bring a spooky, tasty twist to your Halloween get-together.

Nutter Butter Mummy Cookies
Ingredients
- 1 16- ounce package Nutter Butter cookies
- 1 16- ounce package of vanilla melting chocolate
- Candy eyes
Instructions
- Melt the chocolate according to the package instructions.
- Dip each cookie in the melted chocolate and flip to coat both sides. Remove the cookie from the chocolate with a fork and lightly tap the handle of the fork with your finger to help the excess chocolate drip off.
- Transfer each coated cookie onto a piece of wax or parchment paper and allow to cool and set.
- Reheat the remaining chocolate until melted and transfer it to a piping bag.
- Drizzle the chocolate over the top of each cookie to create mummy “bandages.” Add two candy eyes to the top of each cookie, then allow the chocolate to set before serving.